Case
Home / Case / User Manual / Installation and maintenance of pressure reducing valve

Case

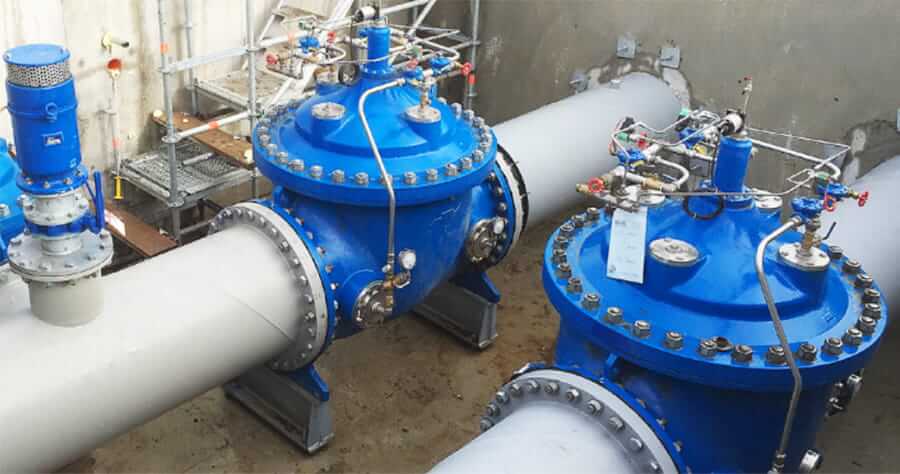
Installation and maintenance of pressure reducing valve
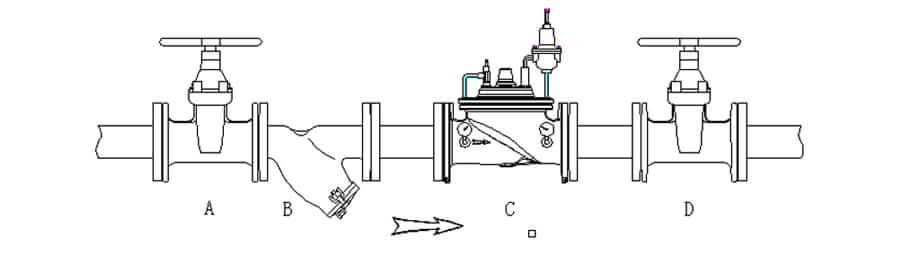
1. Confirm the installation direction of valve
2. Install the partition valve before and after the pressure reducing valve
3. A filter must be installed in front of the pressure reducing valve
4. After the installation of the pressure reducing valve, the pipeline must be cleaned before formal use.
5. The piping and guide valves of the pressure reducing valve shall not be collided during installation.
Operation
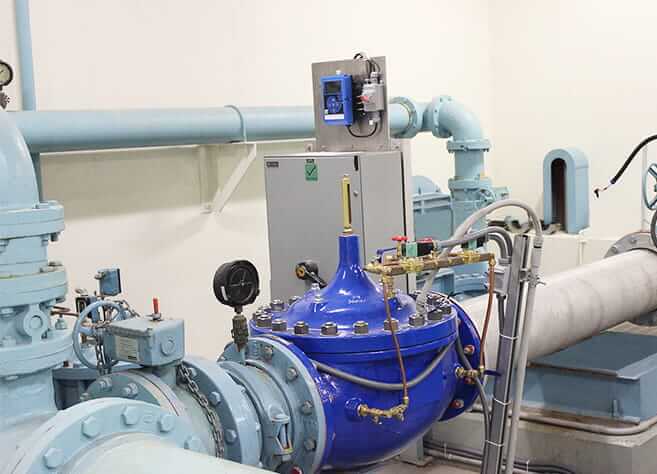
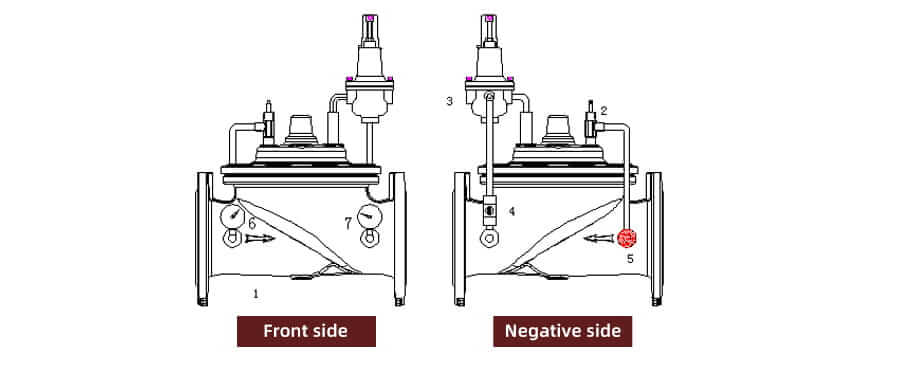
1. Open all the ball valves in the pressure reducing valve piping system and open the small blue hand wheel on the needle valve.
2. Loosen the lock nut on the pilot valve.
3. The pressure at the back end of the pressure reducing valve from the factory is 10 bar, compare the actual pressure displayed with the required outlet pressure on site; if the outlet pressure needs to be increased, turn the adjusting screw clockwise; if not, turn the adjusting screw counterclockwise (counterclockwise adjustment requires the water in the pipe to be flowing dynamically, if the water is static, empty the water).
| The pressure increased or decreased with each rotationof the adjusting screw(bar) | |
| PN16 | 0.49 |
| PN25 | 1.94 |
Note :That this adjustment of outlet pressure is only for rough adjustment, and the precise adjustment must be made when the pipeline system is carrying through fluid.
①Slowly open the inlet isolation valve to fill the pressure reducing valve with fluid.
②Loosen the plug at the uppermost end of the pressure reducing valve, bleed off the air and screw it back on.
③Gently open the isolating valve at the outlet end to create a small flow in the pipework.
④Slowly adjust (half a turn at a time) the adjusting screw on the guide valve until the desired outlet pressure is reached;
1. Open all ball valves in the piping system of the pressure reducing valve, and open the small blue hand wheel on the needle valve.
2. Loosen the lock nut on the pilot valve.
3. The pressure at the back end of the pressure reducing valve delivered by the factory this time is 10bar. Compare the actual pressure display with the outlet pressure required on site; If the outlet pressure needs to be increased, turn the adjusting screw clockwise; Otherwise, the adjusting screw should be rotated counterclockwise (the water in the pipe should be flowing dynamically when adjusting counterclockwise; if the water is static, the water should be emptied).
4. Open the inlet cut-off valve slowly to fill the pressure reducing valve with fluid;
5. Loosen the plug at the top of the pressure reducing valve, drain the air, and then screw it up again;
6. Slightly open the outlet end of the partition valve, so that the pipeline system to produce a small flow;
7. Slowly adjust the adjusting screw on the guide valve (turn half a turn at a time) until the desired outlet pressure.
Maintenance
1. Regularly clean pipes and valve cavities to prevent garbage from accumulating in valve cavities and affecting valve performance;
2. Check the piping and joints regularly. If they are loose, lock them with a wrench;
3. For valve performance problems and solutions, please consult the factory.
Installation and maintenance of pressure reducing valve